Sunday, February 22, 2015

Puzzle & Dragons Game Review/Overview

PaD's title screen
Hey, everybody. As you can no-doubt see, it's been a while since my last post. As you can probably guess from the content of that last post, I got a bit tied up in real-life stuff and fell out of the habit of posting informative stuff here, or any other stuff here at all for that matter.

Well, as it turns out, I'm also unsubbed from WoW for the time being. Don't get me wrong, Warlords is pretty great and if you still haven't bought it, I recommend it strongly. Warlords has some of the best leveling content WoW has ever made. It's just that after getting server first H Garrosh, raids don't really interest me like they used to. That's a mountain I've already climbed. (Also I just might be depressed, which would explain my complete lack of thrill at downing bosses or acquiring gear anymore.) But yeah, it's not a problem with Warlords, go have fun with it!

...as for what I've been playing, it's been a lot of single-player stuff, including this mobile game called Puzzle & Dragons (Google play store // Apple iTunes store) by GungHo. Puzzle & Dragons (PaD) is like a hybrid between Pokemon and Bejeweled. Sort of. Of course, fans of either game will notice the flaws in that description as soon as they pick up PaD.

Free-to-Play (not really.)


Let's get this out of the way up front: the game is free to install. The game can be played, and played successfully without ever spending money on the game. Even things which need the premium currency can be obtained, as GungHo routinely gives samples out for logging in each day, beating new dungeons, etc. However, the game will try to make you want more of this premium currency than it actually gives out. It is very good at it. That said, if you find yourself liking the game, I do strongly recommend buying some exactly once; if anything happens to your phone, GungHo can help you recover your game data if you ever paid them any money.

That said, it's not uncommon to hear of people spending thousands of dollars on the game. Don't do something you'll regret.

Gameplay

Players of PaD are immediately offered a choice of a starter fire, water, or plant Pokemon dragon. Unlike Pokemon, the choice barely matters at all. Which one you choose slightly effects when some limited-time events occur (but everyone gets the same events, just at different times), and you can acquire the other starter dragons later in the game pretty easily. I chose water. After the player has chosen a starter, the game offers a short tutorial explaining how to attack, clear dungeons, level up your monsters, evolve your monsters, edit your team, and use the Rare Egg Machine (REM). I'll explain a bit about those things here.

This game board has 8 possible combos.
PaD players first select a dungeon to enter. Think of a dungeon as a pre-set group of 1-10 enemies to battle in a row, rather than as a location. Entering dungeons costs Stamina, which refills slowly at a rate of 1 point per 5 minutes. If this runs out, players must wait to continue playing, or pay a Magic Stone (the game's premium currency - 1 stone ≈ 1$) to instantly refill it. Once inside a dungeon, the player is presented with a screen like this one:

Players touch and drag one orb around the screen in an attempt to make as many groups of 3-in-a-row as they can within 3 seconds*. Unlike other orb-match style games, the player can move the orb they select as far as they like within the time limit, not just one space. It will switch places with each other orb it passes through along the way. It's actually a very fun system and has a lot of room for a player to improve their own puzzle ability. New players often match only 1 or two groups per turn, while some of the best players routinely make 8 or more. New random orbs fall in to replace those that were matched, which can then immediately break if they fall into groups of three. This adds an element of luck to the game, but also a new element of skill: players can leave groups of two orbs exposed in an attempt to attract these lucky "skyfall" combos.

For each group of orbs the player makes, all of the player's monsters of that color will attack, and the damage increases with how many orbs of that color were matched and how many groups were made in total. Breaking heart orbs heals the player's health. After each of these turns, the enemy team takes a turn. The enemies' attacks vary from simply dealing damage to the player, to "binding" one or more of the player's monsters for several turns, to transforming orbs on the player's board from one type to another.

When an enemy is defeated, it drops some coins and possibly an egg, which will contain a weaker or pre-evolved form of itself. This is a bit of a psychological trap, however: if the player is defeated, he or she won't be allowed to keep any of these eggs or coins unless he or she pays a Magic Stone to continue the dungeon. While this returns the player to full health and allows him or her to keep their loot, often when a player is defeated, they're in a bad situation that a simple health refill won't fix, and they're likely to die again and again until they either run out of money or give up. Most dungeons conclude with a particularly difficult boss monster as the final battle. This is designed on purpose to maximize the revenue from players being defeated and buying the ability to keep all of the loot previously earned in the dungeon. It's brilliant from a financial standpoint; GungHo makes roughly a zillion bucks every day. It does make the game slightly less fun though, because players may regret mistakes more than they would otherwise, and being able to essentially buy victory cheapens the feeling of actual success.

Advancement

Loot, from a successful dungeon.
If the player defeats the boss, then the game awards the coins and eggs that dropped during the dungeon. Coins are mostly used for converting undesired monsters into XP for the player's useful monsters, but are also used to unlock difficult dungeons later in the game. The eggs immediately hatch into new monsters that the player can use. Most of the commonly-dropped eggs contain monsters that are only useful for new players, but the rarer ones or ones from the most-difficult dungeons are powerful and useful to everybody. Much of the game is spent clearing dungeons in search of specific monsters that the player desires.

A monster can actually gain power in five different ways.

The first, as mentioned above, is converting other monsters into XP, which raises a monster's level. This increases HP, ATK (damage dealt), and RCV (healing) by a small amount, which varies by level and by monster.

When a monster gains enough XP to reach its maximum level, (varies by monster, anywhere from 1 to 99) it can evolve into a stronger form, which costs some more coins and 1-5 "EVO Material" monsters. That resets it to level 1, but gives it higher starting stats and usually higher stat growth at level up. Sometimes this also grants a new Active Skill (special attacks monsters can use after a certain number of turns in battle - more on this later) or Leader Skill (passive special abilities that only take effect if the monster is in the first slot in the party.)

TAMADRA - these activate
awoken skills when fed to monsters.
Some monsters obtained by evolution or from difficult dungeons can learn Awoken Skills, passive special abilities that are always on regardless of which team slot the monster is in. If a monster has these skills available, they can be unlocked by feeding it another copy of the exact same monster (same evolution stage too) or a special Awoken Material monster called TAMADRA. Awoken skills vary wildly in value. Some simply increase HP, ATK, or RCV, but others nullify enemy special attacks, cause the owner to deal insane damage when making groups of 4 orbs, or cause Active Skills to become available earlier in a dungeon.

Speaking of Active Skills, that's another way to improve a monster. Nearly all monsters have an Active Skill. Most do very useful things, such as: converting an unneeded orb type into a more-useful one, healing the player on-demand, curing status ailments, slowing down the enemies, or even making the player invincible for a turn. If the player feeds a monster with the same Active Skill to another monster, the target monster may (10% chance) increase it's Active Skill level (skillup). This reduces the cooldown turns before the Active Skill can be used by 1. This is a tremendously powerful effect, and increasing skill levels becomes the core of progression in the endgame. Many players complain - and rightly so! - about the very poor 10% chance to increase a skill. It's often very difficult to acquire another monster with the same Active Skill in order to attempt to gain skillups. While GungHo often throws multi-week-long 2x skillup chance events, even a 20% chance leads to players experiencing long unlucky streaks of no skillups, which leads to much frustration and rage. The skillup mechanic is the worst thing in the game. While there is a series of special monsters similar to the TAMADRA that give a 100% guaranteed skillup, they're spectacularly rare, come only from a limited set of very difficult dungeons, and those dungeons cost millions of coins to even attempt.

My first hypermax monster.
He can't be improved any further.
Lastly, a monster can gain stats by consuming a monster that has extra bonus stats, marked with a floating plus symbol by its egg when it drops in a dungeon. These "+eggs" grant either +10 HP, +5 ATK, or +3 RCV, and can be stacked up to 99 copies of each stat boost on the same monster. +Eggs are pretty rare, so it takes months to get a single monster to the maximum +297 status.

If a player manages to get a single monster to max level in it's highest evolution, with a maximum skill level, all its awoken skills unlocked, and +297, it's referred to as "hypermaxed" and can't be improved any further. While this takes a long time, any player who sticks with the game will hypermax a monster eventually.

When completing dungeons, the player also gets some XP for the player's Rank (like a level for the player's entire account). Increasing Rank does things like increasing the maximum strength of monsters the player can use, increasing how much stamina the player can stockpile at one time (and thus, the toughest dungeons he or she can attempt) and how many friends the player can have at once. Also, every time the player ranks up, he or she gets a full stamina refill. Because rank ups slowly taper off, this leads to the player being able to play continuously at first, but gradually needing to wait more and more (or pay more and more) as the game wears on.

Egg Machines

The single biggest source of revenue for GungHo is the Rare Egg Machine (REM) mentioned earlier. Players can spend 5 Magic Stones to receive one random monster egg. Some of the REM eggs contain monsters that cannot be gotten in any other way, and these are what players hope for when using the REM. These REM-exclusive monsters are often modeled after real-world mythological and/or religious figures, have the most powerful stats and abilities, and are also deliberately rare in the REM. The rest of the REM eggs contain reasonably-good monsters, but they can be gotten from defeating dungeons, and are considered to be more-or-less a complete waste of the 5 Magic Stones.

This is obviously gambling, and because players don't know how rare their desired monsters are going in, it's very hard to know just how much value you're getting from spending at the REM. This is where the stories of players spending thousands of dollars on the game come from; in the same way that people become addicted to slot machines, so they do to the REM.

This is a joke, but given what you'll be
getting from the REM, you wouldn't know it.
GungHo frequently throws Godfests, where certain desirable REM gods have a 3x drop rate, but three times [a very tiny probability] is still very tiny. Godfests exist to dangle these powerful gods in front of players, to entice or even trick them into spending stones at the REM. That said, it is still best to only use the REM during a Godfest event, as even a small bonus is still a bonus, and the supply of free sample Magic Stones is very limited.

There is also a less-insidious egg machine, the Pal Egg Machine (PEM). Instead of Magic Stones, this one takes Pal Points, which are awarded for teaming up with a variety of other players in the game, and for logging in each day. The PEM has much weaker monsters than the REM, but because the currency needed to use it is free, there's no reason not to use it as much as possible. GungHo frequently throws multi-week events where the PEM monsters are slightly different than usual, so some players save their Pal Points until a desired event begins, such as the popular Rare Evo Materials PEM event, which features otherwise-difficult-to-obtain EVO Material.

Rarely, there are also "special" REM or PEM options which only contain 5-20 different monsters, usually with some kind of theme. For example, the Batman REM contains characters from Batman (used with permission). Some of these are good, some not so much. Consult with more experienced players if unsure.

Review


Alright, so I know I'm being overly cautionary with regards to the game's monetization scheme, which may have made it sound a bit negative, but the game is actually pretty good. Just be careful not to let it trick you into spending money in a way you'll regret!

Controls

The menus lag slightly on my Samsung Galaxy S III, but I think they work fine on newer phones. During battle, I have some minor issues with it accidentally selecting the wrong orb (rare), my finger going slightly off the bottom of the screen (less rare) and being unable to get the game to recognize a diagonal move (very common). That said, the method of movement - as far as you want within the time limit - just feels freer than Bejeweled, Candy Crush, etc. The UI was obviously designed for a touch screen, and it does feel right. The interface for levelling up and evolving monsters can become tedious to operate later in the game when a player has hundred of monsters to feed and evolve at once.

5/10 - The diagonal movement shouldn't even be allowed if it's going to be this bad. If you pretend diagonals don't exist, then it's more like 8/10.

Depth

PadGuide - Makes hard
dungeons possible. Also
illustrates the game's
depth.
This game is simple to pick up but has a spectacular amount of depth. Later dungeons are a puzzle unto themselves: players need to build a specific team of monsters to deal with the unique mechanics and requirements of each dungeon. Even just picking a dungeon to play is a puzzle of its own as players gradually figure out which dungeons are best for acquiring different resources, and decide which resources they even want next. Monsters and their skills combine in new and surprising ways as the player gains access to more and more of them. It's (nearly?) impossible to obtain every monster, so players never run out of new prizes to chase after. The game features a wide range of difficulty in dungeons, so no matter how good (or bad) your monsters and puzzling skill are, you'll always have a dungeon to work on.

10/10 - Lots of depth, even by AAA paid PC game standards.

Polish

Monsters themselves are not animated at all, but that's acceptable for a turn-based RPG. The menus are nice and stylized. While early dungeons feel somewhat same-ish, the later dungeons are each unique and don't feel procedural at all. I think the biggest place PaD fails is on the availability of information. Some dungeons consume up to 99 stamina to even attempt (8.25 hours of real-world time to recover!) and use mechanics that will utterly destroy you if you don't know they're coming and prepare for them - which works out okay because all serious players look up the dungeon details online** - but there's no way to access this information in game. Similarly, certain monsters need to undergo a special "Ultimate" Evolution in order to evolve past a certain point, which involves feeding them a very specific set of 5 monsters through the power-up interface (as opposed to the evolution interface). There is no way to look up the recipe for these in game. The drop rates and locations for monsters is unavailable in game. The odds for egg machines is unavailable (by design). Players get TAMADRAs without being told how to use them. The game has "surprise" dungeons that are only available for 1 hour, the best of which occur as rarely as once per month - and there's no way to know when they're going to occur without looking it up online.


7/10 - needs more in game info.

Free-to-Play

The game advertises itself as free-to-play, and it is. There is an endless, albeit limited supply of freebie Magic Stones, and with them, players can eventually accumulate a small collection of REM monsters and complete basically all the same content that a paid player could, just more slowly. Some players repeatedly restart the game until they start off with a powerful god, because the game gives you a free REM attempt during the tutorial. (It's boring and slow, but does guarantee a good starter monster. I don't personally recommend it, but most of the game's community does.) So, as free-to-play goes, yes, it definitely can be.

...but the game uses psychological manipulation to try to fool players into spending money in ways they will later regret. The game has bad design elements (stamina!) borne of the game's monetization scheme.

7/10

Overall

PaD is a solid, fun Bejeweled-like game with a twist, attached to a puzzle-RPG with a ton of depth and a lot of content. The art is pretty to the point that the community frequently emphasizes aesthetics over functional features of a monster. The menus are intuitive, albeit in need of streamlining. Progression is sometimes gated behind randomness (rare EVO Material drops, or skillup chances), which can be frustrating.

8/10 - Give it a try. If you like match-3 games or Pokemon, you'll enjoy it, and if you don't spend too much money on it then you won't regret it either.


* Some enemy attacks reduce the movement time limit to less than 3 seconds, and some player abilities can increase it.

** PuzzleDragonX (website) is a good source for dungeon info if you're at a computer (hard to use on mobile browsers), or the PadGuide app is a good free (banner ad supported) resource for mobile devices (Google Play store // Apple iTunes store).

Monday, December 9, 2013

For my angel:

The clearing is awash in darkness, in stillness. Stillness broken neither by footstep nor voice.

As if to spite the dark, an angel appears.

Her head is wreathed in a dancing flame, and her face is a glimpse of the divine.

I rush from my hiding place, but try as I might, she remains one step out of reach.

She is not of my world. She is a world away.

Eventually, I must return to my mundane surroundings, but I am left with a chill. A chill in my body, in my bones, in my soul.

I feel as though I have witnessed something not meant for mortal eyes. I fear I may never be the same.


You are my Inner Fire and my Hymn of Hope.
I love you, Shawna!

Monday, November 25, 2013

Siege of Orgrimmar Fight-Specific Tips (Part 3/4)

So, remember what I said last time about the second wing not being strategically complex? Say good bye to that, because here in wing 3, the fights are entirely about their unique mechanics. This section will test your raid's ability to preform under seriously unusual conditions.

[Updated: Added Heroic section and a note about Spectral Guise to Thok.]

Monday, November 18, 2013

All-In-One Priest Level 90 Talent Macro

Vaguely symbolic of a macro.
Is anyone else tired of swapping the button on your bars every time you switch your level 90 talent out? Just kidding, of course you are. Courtesy of some priest on some forum somewhere, (sorry, I really don't know who I originally got it from,) I have a macro for you all that will make button swapping a thing of the past.


Monday, October 28, 2013

Siege of Orgrimmar Fight-Specific Tips (Part 2/4)

Welcome to the second wing. Here's where Blizzard starts to turn up the heat. These fights aren't strategically complex, (except maybe H Shamans,) but they do demand a decent level of raid awareness and output.

Thursday, October 17, 2013

Siege of Orgrimmar Fight-Specific Tips (Part 1/4)

Hey, everybody. Since my fight-specific tips series was so popular in Throne of Thunder, I thought I'd do it again for Siege. I'll be breaking these down along the Flex/LFR groupings, but all my tips are primarily for normal-mode, with some heroic notes on the fights I have done.


Monday, October 7, 2013

[5.4] Discipline Healing Basics

Penance: It's what's for breakfast.
Remember last week when I promised a Discipline basics post? Well, here we are.

Contents
  1. Gearing
  2. Enchants
  3. Gems
  4. Glyphs
  5. Talents
  6. Rotation
  7. Buffs

Monday, September 30, 2013

[5.4] Discipline Healing Changes

Hey, everyone, long time no see. I fell into a bit of a rut, and, well, as you can see, I haven't been writing. But anyway, I'm back for 5.4, and it's one hell of a patch.

In case you've been healing all along, here's a quick rundown of what's changed. On the other hand, if you're new to Disc, I should have a new Discipline Basics guide up next week.

Friday, May 3, 2013

Throne of Thunder Fight-Specific Tips (Part 3 of 4)

Eye sea how you died there?
Welcome to the "experimental stuff" wing, where most fights are no longer about everyone independently doing their own thing correctly, and increasingly about coordinating as a group to handle mechanics that no single person can deal with alone. Don't worry, that's actually a good thing; get the mechanics right and it's hard to miss the output checks.

Friday, April 26, 2013

Throne of Thunder Fight-Specific Tips (Part 2 of 4)

Hit 5 koopas with one
shell to get a 1-up!
Whoops! This was meant to be up last week, but it looks like I failed to hit the Publish button. I guess it's convenient though; I should probably give my guild time to clear Iron Qon-Lei Shen before I go advising about them. I'm just gonna push back parts 2 though 4 by a week.


Friday, April 12, 2013

Throne of Thunder Fight-Specific Tips (Part 1 of 4)

This fight is fun for Atonement.
So, a short warning before we begin. I have not been Shadow since two weeks before 5.2. So while I claim to know some things about DPS, I may be missing the shadowy elephant in the room on some or all fights. My Atonement DPS advice should be pretty sound though.

Friday, April 5, 2013

Atonement DPS Guide - Basics

Penance: It's what's for breakfast.
Due to a series of buffs, nerfs to mainstream Disc healing, and the t14 4-piece bonus, Atonement healing is now a competitive raiding spec. It's not really DPS, and it's not really healing. It's the first true hybrid spec. This guide outlines an approach to Atonement focusing on dealing maximum possible DPS.

Contents
  1. Gearing
  2. Enchants
  3. Gems
  4. Glyphs
  5. Talents
  6. Rotation
  7. Buffs

Friday, March 29, 2013

Lolsmite First Impressions

As I mentioned last week, something caused almost all of the healers in my guild to quit all at the same time. Because of this, I'm now Atonement spec. Soon™ I'll have a basic DPS guide for Discipline priests up. For now though, I'm still learning the basics myself.

The first thing I noticed about Lolsmite (which is what I'm going to call Disco Atonement builds) is that the DPS rotation is really simple by comparison to Shadow. I can literally do full DPS with only two buttons. One's a /castsequence macro with a timed reset to cast Solace if it's up, and Smite otherwise. The other's just a normal Penance bind. Because it requires so very little attention, I'm free to do things like not die in fight mechanics and watch HP bars in case I need to cast a real heal.

Friday, March 22, 2013

Mind Flay Mechanics

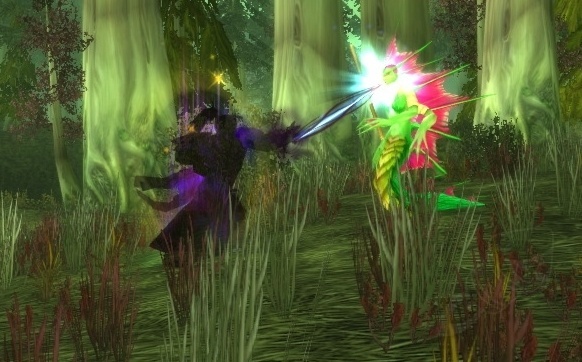
I'm not really sure what a naga is doing in the
middle of a forest, but hey, it's Mind Flay.
So, I bet you were all worried about me when I disappeared a week after returning from my winter hiatus. What? No one? Really? I see, you all had faith I'd be back with more advice and theory. Well, there was a bit of a crisis in my guild, but today I do have some theory for you all. It's time to talk about something every Shadow priest should be familiar with: Mind Flay. I've seen quite a bit of ill-informed rambling about it on various priest forums and around the blogosphere in the last few weeks, so it's time to set a few things straight.

As we all know, Mind Flay is the basic filler spell for Shadow. It's learned at level 10 when you pick Shadow spec, and doesn't really change unless you pick Solace and Insanity much later. Mind Flay is a 3-sec channeled DoT dealing a smallish amount of damage every second. For the first half of its duration, you're locked into the spell by the global cooldown, and so you can't cast anything else. After that, unlike most spells, you can cast something else and it'll interrupt Mind Flay. We call this "clipping".

Friday, March 8, 2013

Insanity

See you all in Trollduar.
Hey, everybody, guess who's back. (Hint: it's me.) Unless you've been under a rock, you all know 5.2 is out. As patches go, this one's pretty glorious for Shadow priests. We've all been a little bit on the wimpy side through last tier, and the couple buffs we've gotten are quite welcome.

Shadow Buffs
  • Insanity redesigned. Details below.
  • Shadowform damage bonus increased to 25%, up from 20%.
  • (Not yet live) Shadow Word: Pain damage increased 25%.
  • Power Infusion now grants 5% damage while active, in addition to its previous effects.
  • Shadowy Apparition pathing is noticeably improved, and the limit is increased to 10 at a time, up from 3. They still fail a lot, but it's a lot less.
  • AoE target cap increased to 20. While this effects all classes, it will bring Shadow closer to specs that can apply DoTs in an AoE in very-many-target situations, and greatly increase the healing of Halo in 25man raids.
Shadow Nerfs
Mind Flay: apply directly to the forehead.
The New Insanity

As promised, let's talk about the new Insanity. The Solace and Insanity talent no-longer grants Shadow priests a spell. Instead, if you start a Mind Flay cast on a foe with your Devouring Plague on it, the cast morphs into Mind Flay (Insanity), dealing +33% damage per Shadow Orb spent. It's an entirely different spell, but I couldn't find it on Wowhead to link it. This bonus damage persists for the duration of the channel, potentially lasting beyond the end of the Devouring Plague DoT itself.

It hits hard. 99% damage may not sound like a lot on such a weak spell, but you can really feel the oomph. Running Solace and Insanity obviously increases the value of Divine Insight, but it also makes sense to use any of the other tier-6 talents with it when they're applicable.

Using Insanity

It is a damage gain (albeit a small one) to prematurely-refresh DoTs shortly before casting Devouring Plague if they would expire during the Insanity period.

Given the option, it is obviously worthwhile to begin an extra Mind Flay (Insanity) immediately before Devouring Plague would expire, allowing you to channel about 2 seconds beyond the end of the effect.

I've read that Mind Blast is higher priority than Mind Flay (Insanity), but by my math, the damage you lose by delaying Mind Blasts (and also the resultant Insanity phases) is approximately equal to the damage you gain from greater Insanity utilization right now. Even so, I believe you should use Mind Blast if it comes off cooldown; the Devouring Plague damage makes that a small damage gain.

Do not cast DoTs during Insanity, and use tier-7 talents only if you would lose the opportunity to do so if you delayed them (for example, AoE targets no-longer clumped for Halo if you wait.)

Saturday, December 1, 2012

Hiatus

As some may have noticed, I haven't been writing lately. Between exam season and the holidays, I probably won't be writing again until January. Cheers!

Thursday, November 8, 2012

Discipline priest buffs.

(Source)
So, Discipline just got some more buffs via hotfix earlier this week. I was surprised; I was already dominating the healing in early Heart of Fear. While this may have been (mostly) due to ideal fight mechanics, I still shudder to think what the healing meters will look like this weekend. Just from shifting Divine Aegis from 30% to 50% (base; pre-mastery) I should gain about 17% healing output, and a bit of mana, as I can stop casting on the raid after Force and Verve sooner. The Rapture change from 150% to 200% should ensure that my mana won't run low before the boss dies anymore.

All-in-all, I'm feeling vindicated about my feelings earlier this expansion regarding Discipline balance. Now if only Mistweaver monks had nerfs in the pipe instead of more buffs.

Monday, October 29, 2012

What you should know about Mistweaver monk healing.

So, I rolled a monk. As I'm the optional 3rd healer in my raid, and because Disc has some problems, I leveled a Mistweaver. Unlike some well-prepared people, I leveled it all the way from level 1, without any instant recruit-a-friend levels. But that's not what this post is about; the actual healing at level 90 is. First, I'll start with things important to non-Mistweavers.

Healing Spheres

The little green balls everywhere? Those are healing spheres. They can be manually cast, or proc off of any heal. They heal 25-35k or so if an injured player touches them. There's no cooldown on touching your monk's balls, so if there's a bunch of them, you can heal tons of health all at once by walking through them. Think of them as a second Healthstone. Tanks, particularly, can make use of these to great effect by tanking near a few, and sidestepping into them if things get rough. (Everyone can do that, it's just most awesome when tanks do it.) When most of my Healing Spheres get used, they're about 20% of my total healing, so if you're grouped with a Mistweaver, do pay attention to them, particularly if you're moving anyway, or the healer is struggling.

Tuesday, October 23, 2012

Exams.

No post this week; exam season.