So, remember what I said last time about the second wing not being strategically complex? Say good bye to that, because here in wing 3, the fights are entirely about their unique mechanics. This section will test your raid's ability to preform under seriously unusual conditions.
[Updated: Added Heroic section and a note about Spectral Guise to Thok.]
Showing posts with label Fight-Specific. Show all posts
Showing posts with label Fight-Specific. Show all posts
Monday, November 25, 2013

Monday, October 28, 2013
Siege of Orgrimmar Fight-Specific Tips (Part 2/4)
Welcome to the second wing. Here's where Blizzard starts to turn up the heat. These fights aren't strategically complex, (except maybe H Shamans,) but they do demand a decent level of raid awareness and output.
Thursday, October 17, 2013
Siege of Orgrimmar Fight-Specific Tips (Part 1/4)
Hey, everybody. Since my fight-specific tips series was so popular in Throne of Thunder, I thought I'd do it again for Siege. I'll be breaking these down along the Flex/LFR groupings, but all my tips are primarily for normal-mode, with some heroic notes on the fights I have done.
Friday, May 3, 2013
Throne of Thunder Fight-Specific Tips (Part 3 of 4)
 |
| Eye sea how you died there? |
Friday, April 26, 2013
Throne of Thunder Fight-Specific Tips (Part 2 of 4)
 |
| Hit 5 koopas with one shell to get a 1-up! |
Friday, April 12, 2013
Throne of Thunder Fight-Specific Tips (Part 1 of 4)
 | |
| This fight is fun for Atonement. |
Friday, August 24, 2012
Shadow Priest Glyphs [Mists]
 |
| Prime glyphs are gone. |
Friday, June 8, 2012
H Madness of Deathwing - Defeated!
 | |
| Me, enjoying the spoils of war. |
Also, we developed a complicated maneuver to permit a Shadow priest to soak an Impale, as we had some issues with our usual method. As per usual, all players other than myself vacated the melee radius just prior to the Impale. I used Fade as they were leaving to shunt any melee swings onto warlock pets (they died) and Dispersion as soon as the Impale cast began. It worked splendidly. The warlocks disagreed.
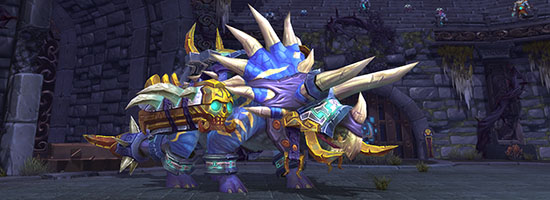
Trouble actually putting together a full raid team aside, I'm pretty happy with how we did this raiding tier. Pic related. Both of the mounts dropped (rare and heroic), and I got the heroic one. I also got [Rathrak, the Poisonous Mind (Heroic)]. [Not Caster Gear] dropped too. I'm not sure who took it, but I'm guessing it wasn't a caster.
On a related note, I will be entering a period of reduced posting until Mists of Pandaria. I will be updating once every two weeks until then. Good luck in Dragon Soul to everyone who's still progressing, and I hope to see you all in Pandaria! May all of your Elementium Fragments spawn in a nice, little, easily-cleavable pile!
Friday, May 25, 2012
Heroic Madness of Deathwing
 | |
| Destroyer of Raids. |
Friday, April 27, 2012
H Spine of Deathwing - Defeated!
Beta updates:
So, on Thursday, we rolled in and oneshot H Spine. I was surprised; when the fight ended abruptly, I thought we still had one plate to go; it felt just that easy. Needless to say, there was much rejoicing.
What we did differently
Our tendon burst DPS has been creeping steadily upwards the entire time we've been attempting H Spine, and feeling it was no longer necessary, several other DPS and I stopped trying to get cooldowns up before we detonated the Amalgamations, and simply focused on burning it as fast as possible. One of our tendon burn phases was perilously close to not meeting the DPS requirement because of this, but it made the fight dramatically shorter. The faster Amalgamation burn also caused the tendon phases to sync up nicely with the Fiery Grips so that we didn't need to kill the Corruption to reset the timer before entering tendon phase.
Our tanks adopted a different strategy for the 5th and 6th lifts; instead of attempting to kite the bloods, they stacked near the rest of the raid and dropped as much AoE as possible. The incidental AoE from procs and the tanks themselves killed 9 bloods almost precisely when the Amalgamation got low on HP. Also, this allowed them to more reliably establish aggro on new spawns, preventing them from meleeing random people.
We had a perfect storm of good RNG luck. I got such a good string of crits once, that I did 1.4M during a single tendon phase- not counting Shadowfiend damage. Likewise, despite making no attempt to get my Shadowfiend, and despite having about half the usual time between plates, he came up for 5 of the 6 plates. Other DPS report similar uncanny levels of luck. Also, the Blood Corruption: Earth was remarkably kind to us, dropping two stacks on both tanks right off the bat, and coating the majority of the raid before the end of the fight.
So was it just RNG then?
While the RNG probably helped immensely, the fact is that the healers finished the encounter with about 60% mana each, and unused healing and mana cooldowns. RNG simply doesn't account for that. Clearly the strategy changes were enough, and the favor of the RNG gods was just icing on the cake.
We spent considerable time on H Madness that night as well. I can see why very few guilds are 7/8H; Madness does seem much easier than H Spine. On about our 5th attempt, we made it to the final phase, and wiped only because we'd never seen it before. The fight is brutal on healing, but as a DPS, it's only marginally harder than normal mode, and this coming from someone who's having to use Dispersion to soak a 1.08M damage Impale meant for the tank. If we get it down before then, I'll write up a detailed account of our strategy for next week.
- Mass Dispel is now much cheaper, but has a 15 second cooldown (like all other dispels in the beta).
- Void Shift is now baseline (level 87), and has a 6m cooldown. Now, much like Life Grip, all priests will have a new griefing tool. Or something functionally equivalent to Lay on Hands. Depends how responsible they are.
- Related: Spectral Guise is now a talent in the survivability tier.
- Many talents (mostly healing) have had their numbers tweaked. Yawn.
- From Darkness, Comes Light - Now can accumulate two charges. Cool, fewer go to waste, and can accumulate them for burst.
- Twist of Fate - Now lasts for 10sec after damaging/healing a low health target. This should make it appreciably better than it was, as before it was dramatically weaker than the other options on the same tier. Now on add fights it may be far superior.
- Mindbender - New talent. It's another Shadowfiend with twice the mana return, but a longer cooldown.
- Shadow got a bunch of Discipline abilities. Bug maybe? The list: Borrowed Time, Meditation (25%), Rapture, Spirit Shell. If this is not a mistake, then my thoughts are twofold. One: it's nice for Disc/Shadow priests so they don't need to heal like a holy priest if they need to heal in Shadow spec. Two: Healing is now much more appealing for a Shadow priest, as you'll likely be compensated for the time spent to cast a PW:S here and there in the form of haste and mana. It is possible that PW:S might become rotational, for the boost it offers to a DoT used immediately after, particularly with the tier-14 4-piece bonus. At first glance, PW:S seems to be DPS-neutral, which means it may as well be rotational for the survivability boost.
- Glyph of Fade now grants 10% damage reduction. Cool. More survivability tools are always welcome.
- We now have preliminary tier-14 set bonuses. 2 piece: +10% Mind Flay crit. Since we still have the MFcrit-to-Shadowfiend conversion, this will be a powerful mana boost. 4 piece: +3 sec DoT durations. Not overwhelmingly powerful for single-target, but sexy-awesome for multi-DoTing. I approve.
So, on Thursday, we rolled in and oneshot H Spine. I was surprised; when the fight ended abruptly, I thought we still had one plate to go; it felt just that easy. Needless to say, there was much rejoicing.
What we did differently
Our tendon burst DPS has been creeping steadily upwards the entire time we've been attempting H Spine, and feeling it was no longer necessary, several other DPS and I stopped trying to get cooldowns up before we detonated the Amalgamations, and simply focused on burning it as fast as possible. One of our tendon burn phases was perilously close to not meeting the DPS requirement because of this, but it made the fight dramatically shorter. The faster Amalgamation burn also caused the tendon phases to sync up nicely with the Fiery Grips so that we didn't need to kill the Corruption to reset the timer before entering tendon phase.
Our tanks adopted a different strategy for the 5th and 6th lifts; instead of attempting to kite the bloods, they stacked near the rest of the raid and dropped as much AoE as possible. The incidental AoE from procs and the tanks themselves killed 9 bloods almost precisely when the Amalgamation got low on HP. Also, this allowed them to more reliably establish aggro on new spawns, preventing them from meleeing random people.
We had a perfect storm of good RNG luck. I got such a good string of crits once, that I did 1.4M during a single tendon phase- not counting Shadowfiend damage. Likewise, despite making no attempt to get my Shadowfiend, and despite having about half the usual time between plates, he came up for 5 of the 6 plates. Other DPS report similar uncanny levels of luck. Also, the Blood Corruption: Earth was remarkably kind to us, dropping two stacks on both tanks right off the bat, and coating the majority of the raid before the end of the fight.
So was it just RNG then?
While the RNG probably helped immensely, the fact is that the healers finished the encounter with about 60% mana each, and unused healing and mana cooldowns. RNG simply doesn't account for that. Clearly the strategy changes were enough, and the favor of the RNG gods was just icing on the cake.
We spent considerable time on H Madness that night as well. I can see why very few guilds are 7/8H; Madness does seem much easier than H Spine. On about our 5th attempt, we made it to the final phase, and wiped only because we'd never seen it before. The fight is brutal on healing, but as a DPS, it's only marginally harder than normal mode, and this coming from someone who's having to use Dispersion to soak a 1.08M damage Impale meant for the tank. If we get it down before then, I'll write up a detailed account of our strategy for next week.
Friday, April 13, 2012
Heroic Spine of Deathwing
I've decided to stop dedicating entire posts to beta updates. It seems futile. The changes are just too frequent. I may do another full beta post in a month or two when things have settled out. For now, I'll just comment on beta changes at the start of another post like I'm doing now. All priests (not merely healing specs) got a new spell called Feathers from Heaven. It's placed like Lightwell, allies can walk through it to gain a burst of speed identical to the one from Body and Soul. Also, Shadow's spirit-to-hit conversion is back, and Vampiric Touch restores 15% max mana over its duration. This means we'll not have mana issues when multi-DoTing for a change.
So, the guild has been stuck on H Spine of Deathwing for a few weeks now. The last remaining hurdle for us to overcome is surviving the third plate, as the bloods are spawning so quickly that they can neither be safely tanked, nor destroyed. This post is going to be a combination of tricks I've learned to help shadow priests, as well as a request for advice if anyone knows what I can improve.
Tendon Burst
I already wrote a post over at Shadowpriest.com on this topic, but that was intended for regular Spine. On Heroic, the damage requirement is far more strict. On 10man, with the current 15% nerf, each DPS requires 900k damage over the 18sec vulnerability window (assuming standard 2/3/5 raid comp). While quite doable, it does demand that Shadowfiend, Archangel, and Bottled Wishes be used on every tendon. While the 90sec cooldown on the latter two is available without any additional effort, Shadowfiend requires some gymnastics to activate in time.
Activating Shadowfiend basically means spamming Mind Flay to the exclusion of all else until it's time for tendon burst, and hoping it's enough. I'd say this gives me about a 19/20 chance to have Shadowfiend by the time I need it. If I were missing even a single crit buff (5% on raid, 5% on target, 3% from Focus Magic) I'd have unacceptably high odds of it failing to come up. If my haste wasn't already reforged as low as it could go, I would reforge some of it into crit to try and smooth out my Shadowfiend uptime. Note that while crit is superior to haste for the actual burst phase, it's still inferior to mastery.
Preforming the burst itself is quite simple. Summon shadowfiend, during the GCD activate Archangel and Bottled Wishes, MSp x3, MB, MSp until MB comes up again, MB, MSp until time runs out, DP instant cast at the final moment. If it's the second burn on that particular tendon, try to replace MSp casts after Shadowfiend has expired with SW:D. Obviously, if you don't yet have your 4-piece, you're simply incapable of meeting the demand.
Handling Fiery Grip
By all accounts, shadow priests are ideal to handle the grip. On normal, it was a no-brainer to assign us to grip duty. On Heroic, this can jeopardize Shadowfiend uptime. Consider telling your guild to make someone else do it. Seriously. Especially if you can't get Focus Magic. That said, despite this, I've been on grip duty on all of our attempts. Because the Corruption probably should be made to die right before the tendon burst phase (so as to prevent a grip during it), you may want to assign two people to breaking grips, both so they break faster, but also because some "overkill" damage is desirable to get its health low. We have myself and an arcane mage on grip duty.
Sealing the Deal
We've made it to the 5th plate a handful of times, and made it past that once. The trouble is, it seems that our healers can't handle the sheer flood of Bloods that spawn with 5 stacks of Degradation (which both lowers the raid's HP and increases the spawn rate of the Blood.) So we've got two strategies that we're planning to try to get us over the final hump.
The simpler of the two, we use Heroism on the first tendon burn, use burst potions, long duration cooldowns, and have the tanks and healers assist on DPS. ...except we' can't do it. We tried a few times and got it to about 7%. A little bit more gear, a little bit better class stacking (warlocks, for example, seem non-viable, and yet, we're using one,) or another 5% nerf and we could do this. That would mean that the most stacks of degradation we would ever face would be four.
The other, more realistic plan we have right now, we collect two Amalgamations for the 5th and 6th plate. We get both to low health. Detonate one, burn. Detonate the other, burn. Hope we don't wipe while burning. Heroism should compensate for the fact that no one will have time to get cooldowns back in between. Unfortunately, we've never survived long enough to try this since we thought of it.
Those Fucking Debuffs
As I just mentioned, we haven't made it past the 5th plate since I came up with the two-amalgamation idea. Why? Those fucking debuffs. Guild leadership thought it was a good idea to rotate out a stellar tank and healer for some alt tanks and healers. And Blood of Deathwing keeps detonating. So on top of our common fuck-ups regarding add aggro, or rolls, or damage control, or damage output, or- well, you get the idea, we now also have about a 50% chance to wipe via instant death because the new healer can't dispel.
Since it's not stated clearly anywhere:
Approximately 10 sec after each Corruption is killed, a random raid member receives Blood Corruption: Death, a 16 second debuff, which, if it expires, wipes the raid instantly. When dispelled (it's magic) it hops to a random raid member, keeping the same remaining duration, and it has a chance (seems about 40%) to mutate into Blood Corruption: Earth, which applies 1 stack of permanent 20% damage reduction at 8 sec remaining, and when it expires. Dispelling that (also magic) makes it hop to another raid member, but it can't turn back into Blood Corruption: Death (the Dungeon Journal is a liar; it claims that it can.)
 | |
| I have been fighting this for entirely too long. |
Tendon Burst
I already wrote a post over at Shadowpriest.com on this topic, but that was intended for regular Spine. On Heroic, the damage requirement is far more strict. On 10man, with the current 15% nerf, each DPS requires 900k damage over the 18sec vulnerability window (assuming standard 2/3/5 raid comp). While quite doable, it does demand that Shadowfiend, Archangel, and Bottled Wishes be used on every tendon. While the 90sec cooldown on the latter two is available without any additional effort, Shadowfiend requires some gymnastics to activate in time.
Activating Shadowfiend basically means spamming Mind Flay to the exclusion of all else until it's time for tendon burst, and hoping it's enough. I'd say this gives me about a 19/20 chance to have Shadowfiend by the time I need it. If I were missing even a single crit buff (5% on raid, 5% on target, 3% from Focus Magic) I'd have unacceptably high odds of it failing to come up. If my haste wasn't already reforged as low as it could go, I would reforge some of it into crit to try and smooth out my Shadowfiend uptime. Note that while crit is superior to haste for the actual burst phase, it's still inferior to mastery.
Preforming the burst itself is quite simple. Summon shadowfiend, during the GCD activate Archangel and Bottled Wishes, MSp x3, MB, MSp until MB comes up again, MB, MSp until time runs out, DP instant cast at the final moment. If it's the second burn on that particular tendon, try to replace MSp casts after Shadowfiend has expired with SW:D. Obviously, if you don't yet have your 4-piece, you're simply incapable of meeting the demand.
Handling Fiery Grip
By all accounts, shadow priests are ideal to handle the grip. On normal, it was a no-brainer to assign us to grip duty. On Heroic, this can jeopardize Shadowfiend uptime. Consider telling your guild to make someone else do it. Seriously. Especially if you can't get Focus Magic. That said, despite this, I've been on grip duty on all of our attempts. Because the Corruption probably should be made to die right before the tendon burst phase (so as to prevent a grip during it), you may want to assign two people to breaking grips, both so they break faster, but also because some "overkill" damage is desirable to get its health low. We have myself and an arcane mage on grip duty.
Sealing the Deal
We've made it to the 5th plate a handful of times, and made it past that once. The trouble is, it seems that our healers can't handle the sheer flood of Bloods that spawn with 5 stacks of Degradation (which both lowers the raid's HP and increases the spawn rate of the Blood.) So we've got two strategies that we're planning to try to get us over the final hump.
The simpler of the two, we use Heroism on the first tendon burn, use burst potions, long duration cooldowns, and have the tanks and healers assist on DPS. ...except we' can't do it. We tried a few times and got it to about 7%. A little bit more gear, a little bit better class stacking (warlocks, for example, seem non-viable, and yet, we're using one,) or another 5% nerf and we could do this. That would mean that the most stacks of degradation we would ever face would be four.
The other, more realistic plan we have right now, we collect two Amalgamations for the 5th and 6th plate. We get both to low health. Detonate one, burn. Detonate the other, burn. Hope we don't wipe while burning. Heroism should compensate for the fact that no one will have time to get cooldowns back in between. Unfortunately, we've never survived long enough to try this since we thought of it.
Those Fucking Debuffs
As I just mentioned, we haven't made it past the 5th plate since I came up with the two-amalgamation idea. Why? Those fucking debuffs. Guild leadership thought it was a good idea to rotate out a stellar tank and healer for some alt tanks and healers. And Blood of Deathwing keeps detonating. So on top of our common fuck-ups regarding add aggro, or rolls, or damage control, or damage output, or- well, you get the idea, we now also have about a 50% chance to wipe via instant death because the new healer can't dispel.
Since it's not stated clearly anywhere:
Approximately 10 sec after each Corruption is killed, a random raid member receives Blood Corruption: Death, a 16 second debuff, which, if it expires, wipes the raid instantly. When dispelled (it's magic) it hops to a random raid member, keeping the same remaining duration, and it has a chance (seems about 40%) to mutate into Blood Corruption: Earth, which applies 1 stack of permanent 20% damage reduction at 8 sec remaining, and when it expires. Dispelling that (also magic) makes it hop to another raid member, but it can't turn back into Blood Corruption: Death (the Dungeon Journal is a liar; it claims that it can.)
Friday, March 2, 2012
Fight-Specific Tricks (Dragon Soul part 2 of 2)
 Read part 1 here: Fight-Specific Tricks (Dragon Soul part 1 of 2).
Two weeks ago, I began a two-part series on fight-specific things you can do to help your DPS and your raid in Dragon Soul. This week, I'm picking up where I left off. As before, this post is not written with LFR in mind, but some of the tips may apply there. Likewise, while I would like to give Heroic-specific tips, I simply don't know many of the fights.
Ultraxion
Ultraxion is the Patchwerk of Dragon Soul; he's a raw DPS and HPS check, with very few gimmicks and no movement.
After the first Hour of Twilight, DPS may be subject to Fading Light up to twice per hour. If you're using the MSp/MB rotation with 4pc t13, try to begin it immediately after the first set of Fading Lights for the hour, so you won't be interrupted.
Other than that, this fight is all about raw output. Be sure to pre-pot, and consider checking out my advanced shadow priest DPS guide, if you're not up to snuff.
Heroic: You'll likely be called upon to help soak one or more of the Hours of Twilight. Use Dispersion, and make a /cancelaura macro so you can get back to DPSing as quickly as possible. Here's mine:
This macro casts Dispersion if you don't hold a modifier key, and removes it if you do. (By default, the modifier keys are Ctrl, Alt and Shift, but you can change which keys count as modifier keys in the WoW options.)
Warmaster Blackhorn
Blackhorn is the gunship fight in Dragon Soul, and a perfect place to master multi-DoTing, and to show off your monstrous DPS numbers once you do master it.
Drakes: The drakes spend the first ~20 seconds of their life out of attack range, and if DPS is low, fly away again later. You can and should load these up with DoTs as they fly overhead to drop off each set of melee adds. Beware that Shadowfiend has difficulty meleeing them, even when they're harpooned.
Twilight Sappers: You can hit them with an instant cast DoT right as they land. DP is a good choice. After they reappear, Mind Flay spam will help your melee catch up to them. They're immune to our fears.
Twilight Onslaught: Use Dispersion on these to help your healers out.
Phase 2 (Goriona/Blackhorn): Groups progressing Blackhorn will want you to focus all DPS on Goriona, and specifically to NOT multi-DoT them both. If you're in a farm run though, feel free to do so. If you foresee yourself failing to avoid a Shockwave, you can cheese the damage with Dispersion, but the stun will still hit you.
Spine of Deathwing
The Spine of Deathwing fight is all about precise damage and healing, rather than large raw output. Think of it as the antithesis to Ultraxion.
Burning Tendons: I wrote a detailed analysis of this portion of the fight over on ShadowPriest.com. It's as relevant today as it was last Christmas. Check out my guide here. Seriously, do it. It'll almost triple your output on the Tendons.
Fiery Grip: As a shadow priest, you can turn this fight from healer hell into just another raid boss. After your group is done cleaning up the initial Corruptions, focus the final one and pay loose attention to its cast bar. It will cast Searing Plasma x4, then it will begin channeling Fiery Grip. As the 4th Searing Plasma cast nears completion, pre-cast a Mind Spike, cast a second Mind Spike, and cast an instant Mind Blast. This will interrupt the Fiery Grip after ~1.5 seconds, long before it would deal any damage to anyone. If the grip is on you, use Dispersion to soak the damage and call for help. Your raid will love you.
Late fight (many Corrupted Bloods, handle it!): As the fight draws to a close, you're likely to see Corrupted Bloods spawning faster than the raid can make use of their residues. 1-2 DPS should devote themselves to AoE; the bloods deal far less damage as they explode than they do if left alive to melee the healers. Your raid may also call upon you to help heal. Divine Hymn, as always is quite helpful, then I recommend Flash Heal spam on players with the debuff.
Madness of Deathwing
Madness of Deathwing is the final boss of Cataclysm, and in my opinion, the best-designed raid endboss since Ulduar. This fight taxes every aspect of your raid, from healing to raw DPS, to burst DPS, single-target, AoE, defensive cooldown use, multi-DoTing and more.
Mutated Corruption: If your group isn't depending on killing it before a second Impale, or if you'll manage that regardless, you can multi-DoT the limb tentacle while this is up. Also, Shadowfiend had been known to have problems meleeing this. Take care not to push the limb tentacle to 75% during this phase though; you'll spawn Blistering Tentacles.
Elementium Bolt: If the time zone is active, MSp/MB will likely kill it before it lands. If not, MSp/MB is still the most effective way to kill it, just make sure to be far away from the impact site.
Blistering Tentacles: Multi-DoTing or MSp/MB are both good options here. Tailor your choice to your raid group.
Regenerative Blood: Make sure you have a fresh Empowered Shadow as these spawn, and center Mind Sear off of your tank.
Cataclysm: For the love of the Light, don't use Shadow Word: Death here without 2pc t13! Once it's over run with your raid to the next platform. As mana can be tight on this fight, consider using Dispersion for the mana while running.
Phase 2 (Elementium Fragments): DoT up any loners, then center a Mind Sear on the biggest grouping of the buggers you can find.
Phase 2 (Elementium Terrors): MSp/MB + cooldowns on the first kill target. After that, de-form and begin blasting the tank with Flash Heal. I don't care if you weren't asked to; he's going to be taking upwards of 100k every second. Keep blasting him until his HP bar stops resembling a tennis rally.
Closing
Thus concludes my 2-part series on Dragon Soul bosses. Next Friday, I'll either write an analysis of shadow priest trinkets, or do something else. Aren't I specific? Feel free to suggest desired topics in the comments.
Friday, February 17, 2012
Fight-Specific Tricks (Dragon Soul part 1 of 2)
 Read part 2 here: Fight-Specific Tricks (Dragon Soul part 2 of 2).
The last few weeks, I wrote about the basics of shadow priest DPS, and advanced shadow priest DPS tactics. This week, I'll be writing about things you can do on each fight in Dragon Soul to help your raid out. This post will not be written with LFR in mind, but some of these tricks may apply there. Similarly, while I intend to point out Heroic-specific things you can do, I simply don't know all of them. I'm only familiar with 3/8 Heroic.
Morchok
Morchok is by far the easiest encounter in Dragon Soul on both difficulties. The fight consists of a stand-and-burn phase and survival phase.
During the burn phase, DPS will need to move to handle certain AoE damage mechanics. Use good movement DPS tactics to minimize damage lost, and position yourself so that the Resonating Crystal will push you towards where you want to be when it explodes.
When Black Blood of the Earth is cast, try to head for a place with two shards of Earth's Vengeance close to each-other. Once behind, you can shoot through the gap between them to continue DPSing through this phase. Failing that, it is sometimes possible to shoot past the edge or over the top of a single shard, if you stand back to max range.
Heroic: There are two Morchoks. And what do we do to two targets? That's right, we multi-DoT! Try to load up both right after the split, and when you need to run for Black Blood, try to get between them to DoT up both. (Beware, you need to LoS both sets of Blood.)
You may be called upon to help your tank soak the Double Stomp. Shadow priests glyphed with Inner Fire can survive a Double Stomp without any extra protection on 10man, but as this fight is primarily about healing, you should use PW:S and Dispersion to help take the edge off. As always, you can support the healers with your Hymns.
Warlord Zon'ozz
Warlord is often a stumbling block for PuGs and low-end guilds. The fight involves bouncing a ball around, dispels, and intense tank and AoE healing demands, at least compared to other early normal-mode fights.
During the ball phase, DPS is pretty simple, and there's not a lot you can do to increase DPS. Most wipes happen because a tank dies towards the end of this phase, or the DoTs go undispelled. Mass Dispel (possibly glyphed) goes a long way towards easing the healing burden. I would say "you can use Dispersion in case your HP gets too low to safely dispel," but really, that shouldn't happen; you have your own dispels and powerful passive heals.
At the start of the AoE healing phase, the boss gains stacks of a 5% damage taken increase debuff. There's no need to re-cast your DoTs; they update automatically with damage taken effects on the target. You should however try to pop any cooldowns that became available in the preceding ~30sec right at the start of this phase. You may be called upon to give a Divine Hymn during this phase. Try to anticipate this and not hold Dark Archangel only to waste it on healing.
Heroic: For the love of god, don't Mass Dispel on heroic. During the AoE healing phase, you'll have adds like the ones from the trash. Use cooldowns on them and prioritize the eye stalks. Multi-DoTing is your friend.
Yor'sahj the Unsleeping
Affectionately referred to as "Skittles" by my raid group, Yor'sahj's central mechanic is about choosing which of his 15 (Heroic: 20) modes you wish to fight from a selection of 3 (Heroic: 4) options presented to you at each time.
Blue skittles: You may be called upon to give a mana Hymn right after the drain finishes. Try to anticipate this and refresh DoTs immediately before. If not, Shadowfiend or SW:D immediately before the end of the drain, or Dark Archangel immediately after can ensure you have mana to work with.
Black skittles: The adds for this phase initially spawn spread out. Try to hit each with DoTs as they spawn. Switch to Mind Sear centered off of Yor'sahj once at least 3 cluster up. Cast a Mind Blast to refresh your Empowered Shadow if it falls off and you have orbs; it effects Mind Sear.
Heroic:
Yellow/Black skittles: You'll have two sets of adds, one of which will come simultaneously with the next set of oozes. Roll SW:P on the lot while you get into position to kill the new oozes.
Yellow/Red or Yellow/Green skittles: You'll probably be called upon to heal during this phase. Divine Hymn into Prayer of Healing alternating on each group with Prayer of Mending on cooldown. Glyphed Prayer of Mending is worth the glyph slot, as it's only a major glyph; glyphed Prayer of Healing is not.
Black/Purple skittles: Many wipes occur on this phase due to individual raid members dying from focused damage. As a shadow priest, you're quite unlikely to be the one to bite the dust, so if your raid is single-targeting adds, burn someone else's first. I contend that the best thing you can do to help raid survival is to just blast your AoE and kill them all ASAP though. If your HP drops into the sub-20% range, Dispersion to save your bacon. Do not, under any circumstances PW:S anyone.
Black/Green skittles: Unlike most black phases, the adds will be spread out. Multi-DoT is, as always, your friend.
Hagara the Stormbinder
Hagara is really easy on normal. Not so much on heroic. The fight consists of a main phase alternating with one of two elemental phases, either ice or lightning. You can see which elemental phase she plans to use next by the enchant on her weapons.
Main phase: As a shadow priest, you're pretty much ideal to soak ice lances. Mare your paladins give Concentration aura so your DPS is unaffected. At the beginning of the second and later main phases, Hagara will suffer a 15sec 100% increased damage taken debuff. This is prime time for cooldowns. In later main phases, two raiders will be ice-blocked, a la Sindragosa. Their HP is too low for multi-DoT; Mind Sear if the boss is close to both, Mind Spike/Mind Blast otherwise.
Ice Phase: At the start of the phase, position yourself between two crystals, DoT both up. Position yourself 10% counter-clockwise from the midpoint so the initial Ice Wave misses you. Once you have to move, DoT up the crystals as you pass them, and keep up mobile DPS. You can use Dispersion to let an Ice Wave wash over you if desired.
Lightning Phase: The add always spawns to the north, so get up there and start DPS. Once you start chaining the lightning, regen with Dispersion, or help heal with instant heals.
Closing
There you have it, fight-specific tactics for the first four bosses in Dragon Soul. Next week, I have an in-depth analysis of the tier-13 4-piece bonus for you. The week after that, I'll give the final four bosses of Dragon Soul the same treatment as this week's four.
...and my apologies to anyone that may have seen the original version of this page. I had some major HTML errors that made it more than a little bit hideous.
Subscribe to:
Posts (Atom)